
How I Solved the freeCodeCamp Build A Recipe Page
This post is part of the series in which I recount how I completed and still doing freeCodeCamp certification Projects.


Introduction
This post is part of the series in which I will be writing explanatory articles on how I solved the freeCodeCamp curriculum certification program projects and exercises. I will be starting with working on the project , freeCodeCamp build a food recipe app.
The Project to Build/Solve
The project was about creating or building a food recipe page in which I had to have a heading, some description of the page and also not to forget a main picture of the recipe that I was going to write . I also need to have an ingredient section as well as an instructions section inside this page.
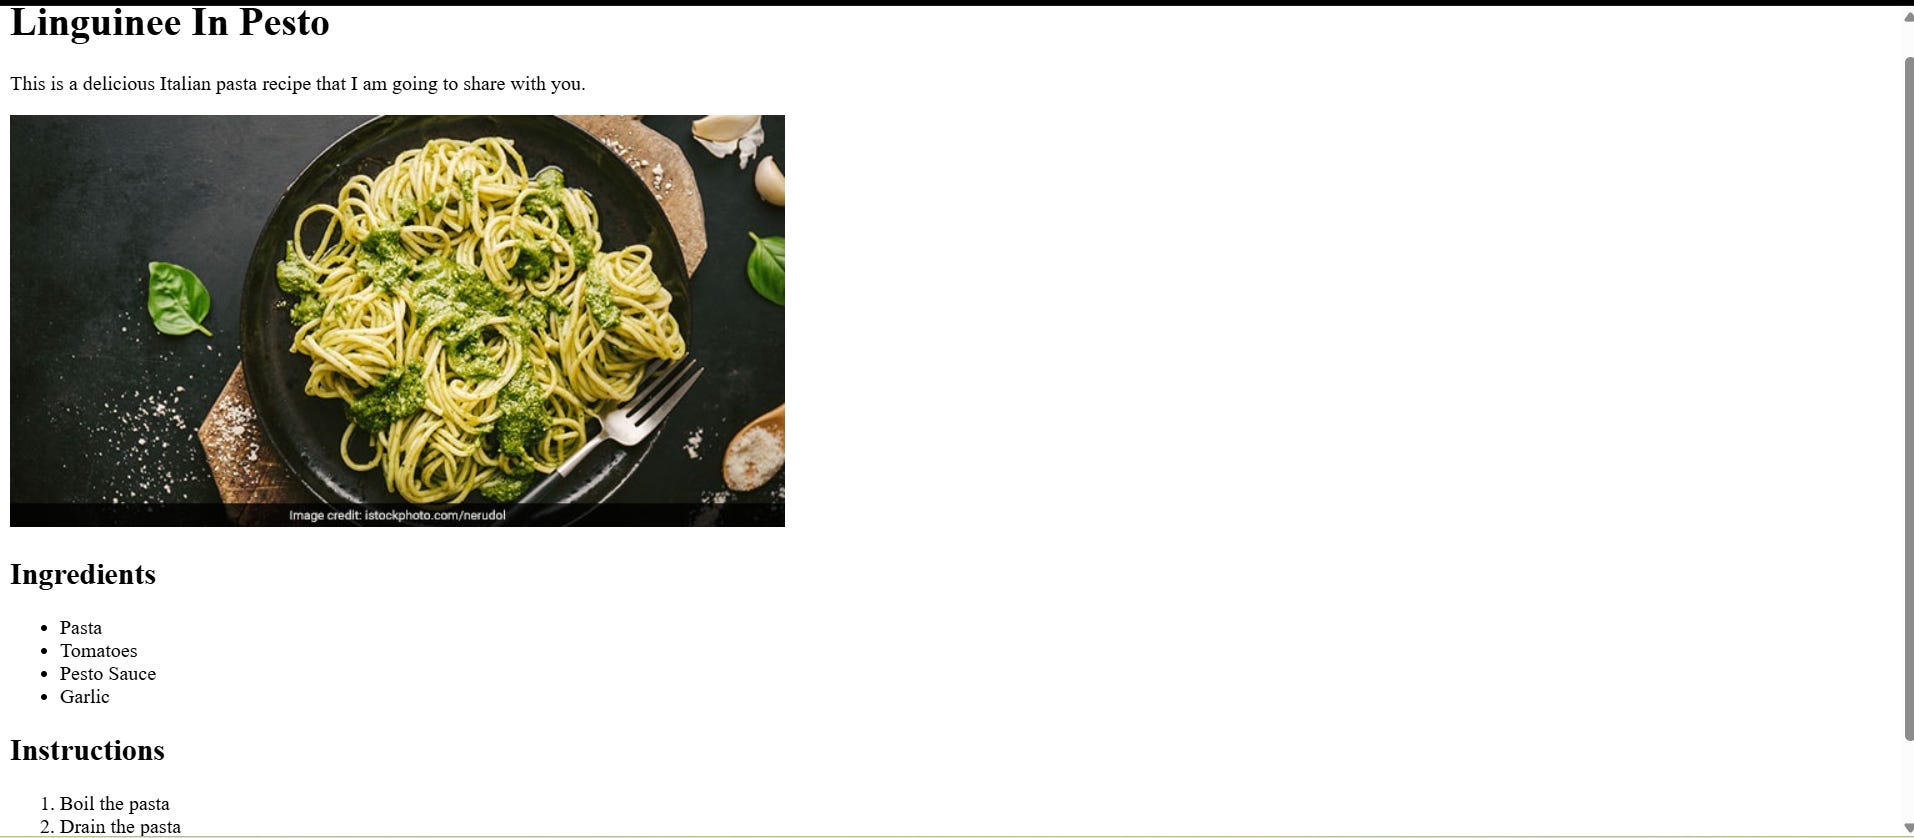
The Final Look Screenshot
Steps I did to code the recipe page
First I used the h1 element to create the heading for the page. Then below that I used the p element to write few lines under the heading. I was supposed to show an image for this page, so I googled and downloaded an image for the pasta recipe using the pexels free of copyright page to get lots of food relate and images.
The next step was how to upload this image to my recipe page? I used the img element with it’s source attribute and I got the url link by uploading the pexel downloaded image on my imgur page as I had written in one of my previous posts.
Next, I used the section tags to create the Ingredient section and the Instructions section respectively. If you have forgotten about section tags and how to use them, here is a previous post on it.
According to the project task, I was told to create the ingredient list as an unordered list , so, I used the ul tags for the same and for the instruction list I was told to use an ordered list, so, I used the ol tags.
My Recipe Page was completed without stress, as I did it step-by-step and bit-by-bit following the task of the project and also keeping in mind, the nature of a recipe page in general.
In the code below, you may find other elements such as !DOCTYPE html and html lang as well as body tag that you may not have heard before, but, just note that there is a basic boilerplate in HTML that is to be used for every html project out there in the web.
The HTML Boilerplate
<!DOCTYPE html>

<html lang="en">

<head>

  <meta charset="UTF-8" />

  <meta name="viewport" content="width=device-width,initial scale=1.0" />

  <title>Title of the page</title>

</head>

<body>

</body>

</html>
The <!DOCTYPE html> tag is just to declare to the web that your page is an official html document, and this is the standard information that is to be mentioned inside every html code.
The html tag with lang attribute is just to show what language is your html page and when you write lang = ‘en’ it shows that your page is in English.
The meta tag with viewport attribute is to provide responsive web design so that all your web pages are responsive based on the device that the user is viewing from.
For example, if the user is viewing it from a mobile device, then, the size of the page will fit the full screen of your mobile device and if he is viewing your page from a laptop screen, then the size will also fit in to the laptop screen view so that your page does not miss out on any of the page compartments while being viewed from different devices.
Imagine, that a user saw your page from a mobile phone, he will see all the parts of your page, that is the heading, the paragraph description, the food image in full and the recipe instructions as well a the recipe ingredients. Some parts of the page should not be cut off from view just because, it is being viewed from a smaller or a bigger device. The proportion of your web page should be maintained to fit any device size. This is called responsive design as per web standards and I just described it in a layman’s language here to keep it simple and sweet for beginner coders in HTML .
The title tag is for the browsers to see what is the title of the page that you have created, and it is not for the users to see.
The head tag is only for the computer to see and not for you and it is the head tag that will contain all the meta tags to be provided to the computer.
The utf tag is the standard character encoding that is used as a standard for every web page in html and the standard value is utf-8 as shown in the boilerplate above.
The full source code
<!DOCTYPE html>

<html lang="en">

<head>

  <meta charset="UTF-8" />

  <meta name="viewport" content="width=device-width,initial scale=1.0" />

  <title>Linguine In Pesto</title>

</head>

<body>

  <h1>Linguinee In Pesto</h1>

  <p>This is a delicious Italian pasta recipe that I am going to share with you.</p>

  <img src="https://i.imgur.com/hvH0yr1.jpg" alt="Pasta on a plate">

  </p>

  <section>

    <h2>Ingredients</h2>

    <ul>

      <li>Pasta</li>

      <li>Tomatoes</li>

      <li>Pesto Sauce</li>

      <li>Garlic</li>

    </ul>

  </section>

  <section>

    <h2>Instructions </h2>

    <ol>

      <li>Boil the pasta</li>

      <li>Drain the pasta</li>

      <li>Saute garlic and tomatoes in a pan</li>

      <li>Add the pastaa to the pan. Your pasta is ready to serve.</li>

      <li>Garnish with bay leaves</li>

    </ol>

  </section>

</body>

</html>
Conclusion
Following the given instructions and also keeping a sample format of a web page for the specific category or niche, that is, in this case, a food recipe page, will help you to visualize the page layout and design and in turn, would be helpful in building the page easily. If you get stuck, just google the concept , not the solution.
Remember, the first step is to write the boilerplate and then follow the other steps in building the page. As a beginner, you may forget all the syntaxes of the boilerplate, but, it is normal to forget. Even I used to forget as a beginner! Just keep a copy of the boilerplate with you and refer to it if you forget the framework of the web.
After attempting the Recipe Page, you may refer to this source code ony codepen to check the live view of the source code.
Read more front-end articles
Learn By Debugging | HTML for Beginners

Thanks for reading Edtech by Meera! Subscribe to receive beginner friendly weekly coding tips and tutorials in your inbox . It's free for now!

Thank you for this post! Seeing your process broken down like this, with the code and the pictures is great for visual learners like myself. I’m just beginning my journey and seeing your process has been like a lightbulb moment 💡